TS2017 ROUTE BUILDING #6 - Getting Started (The Golf Course)
ROUTE MARKERS
Unless you wish to "walk" your way throughout the route you are building, you're going to need some route markers for navigating your way around the World Editor. Route markers are nothing more than a geographical locator within the Route Editor to travel from one place in the route to another. It saves you a lot of time in going from A to B.
In the case of my own route I created a series of markers (known as landmarks in Google Earth) of key locations within the route. Once the landmarks were created I exported the file as a .kml file to the RouteMarkers folder located in my Product folder, awaiting conversion for use in Railworks.
RW Tools comes back into service again for converting the .kml file to a set of two files that Railworks can use. To convert the .kml file to Railworks, proceed as follows:
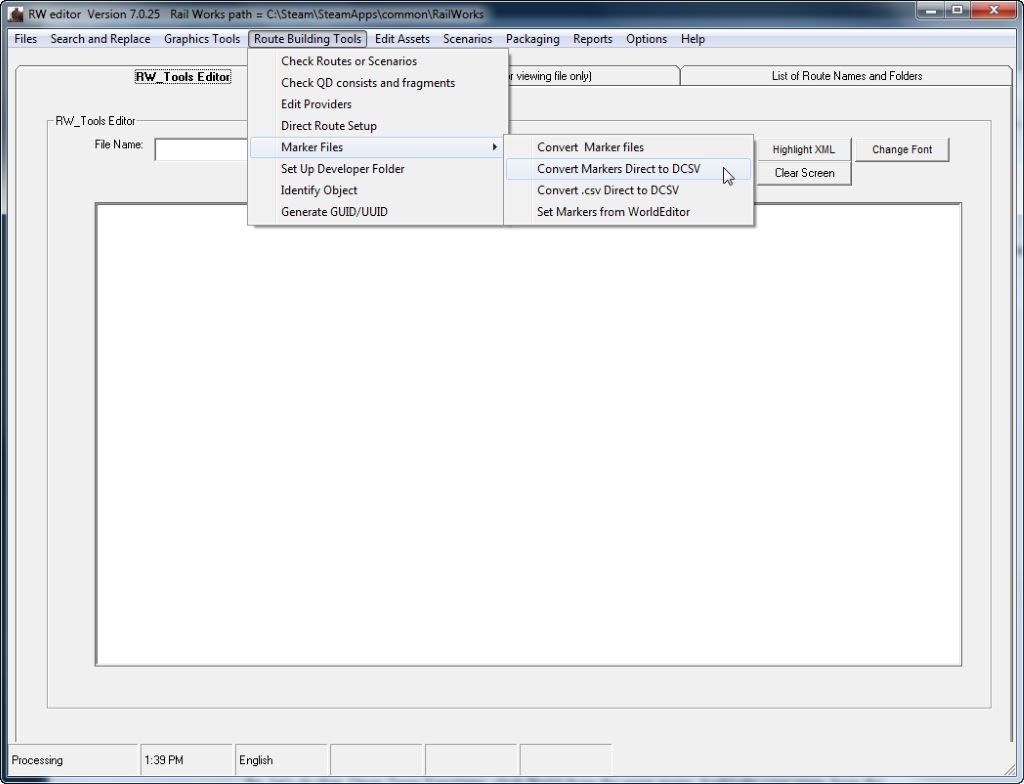
- Open RW Tools and select the tab, Route Building Tools and hover your cursor over Marker Files. Select Convert Markers Direct To DCSV.
You will see the following pop-up:


Select your Provider/Product/RouteMarkers folder in order to set the destination folder for your marker files. Click Proceed. The next window asks you for the .kml file that you saved to your computer earlier. If you put it in the right spot, you should see it in the right-hand pane of the window, similar to the image below:

Providing all the previous steps went well you now have the beginnings of a route to build. Whenever you wish to work on it, simply select your route from the Build Menu/Route tab, and click on Edit.
So, let's do that. Open Train Simulator, click Build from the main menu, highlight your route from the list of routes, then click Edit. You will now be presented with the Railworks version of ...
"The Golf Course"

Even with all that preparation, it is not quite time to dive into the placement of track and scenery. There is a little more to do before proceeding with construction.
More in TS2017 ROUTE BUILDING #7 - World Editor Orientation/Preparing Your World
Back to Tutorials Home Page

